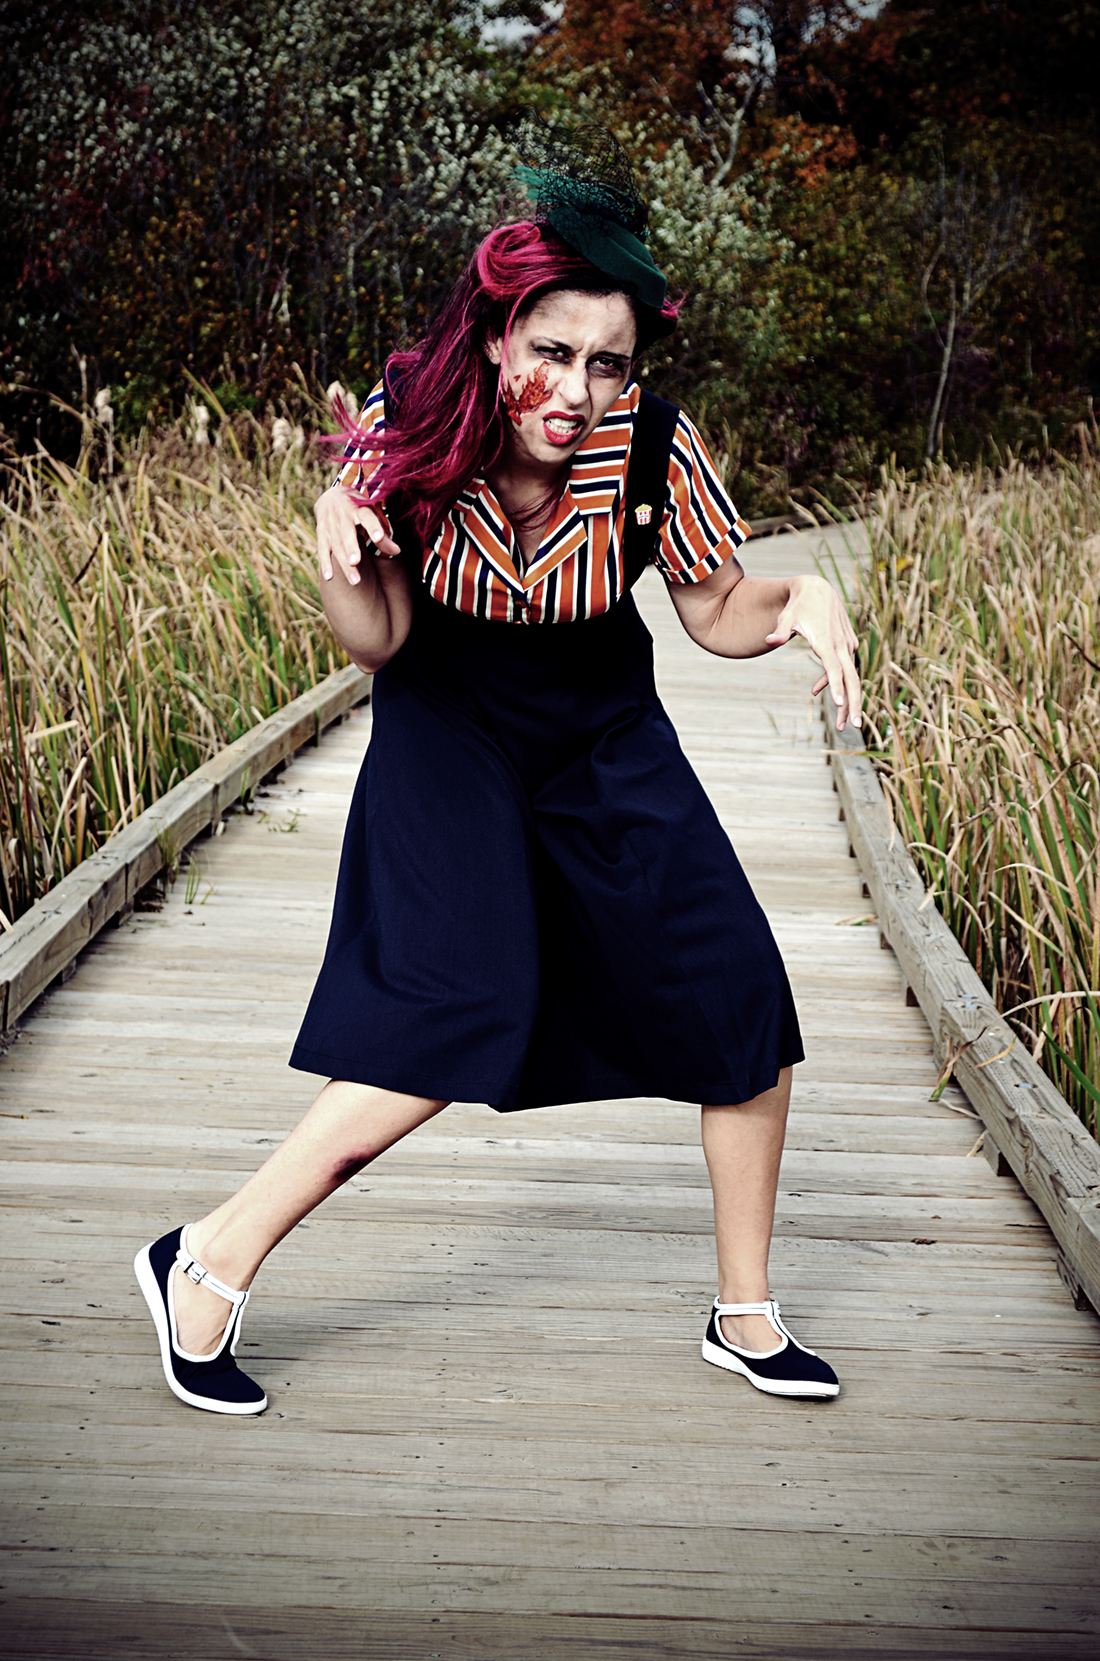
It was two weekends before LAST Halloween (yes, I know I am almost a year late posting this), and I had been wanting to wear this outfit for blog/IG photos. I had gotten the top and shoes at a recent Collectif sale and knew they would be adorable paired with this Tatyana skirt. The outfit was giving me vintage circus/carnival attendant vibes, so I wanted to find a suitable location to shoot.
About 30 minutes away from where I live is an off-road “attraction” dubbed Ponyhenge. It seemed like the perfect place to photograph my carnival zombie look.
Unfortunately, when we got there, there were like 20 people sitting on the ponies! It seemed odd that there would be so many people there. As we drove by we looked a little closer, and it was a wedding! OMG, how cute! I went from being disappointed we couldn’t photograph there to being thrilled that some couple decided to tie the knot surrounded by their best friends and family and a circle of abandoned rocking horses.
We went and grabbed coffee and snacks to kill some time before swinging back over to take pics. When we returned, the wedding party was still going strong, so we needed to find an alternate location.
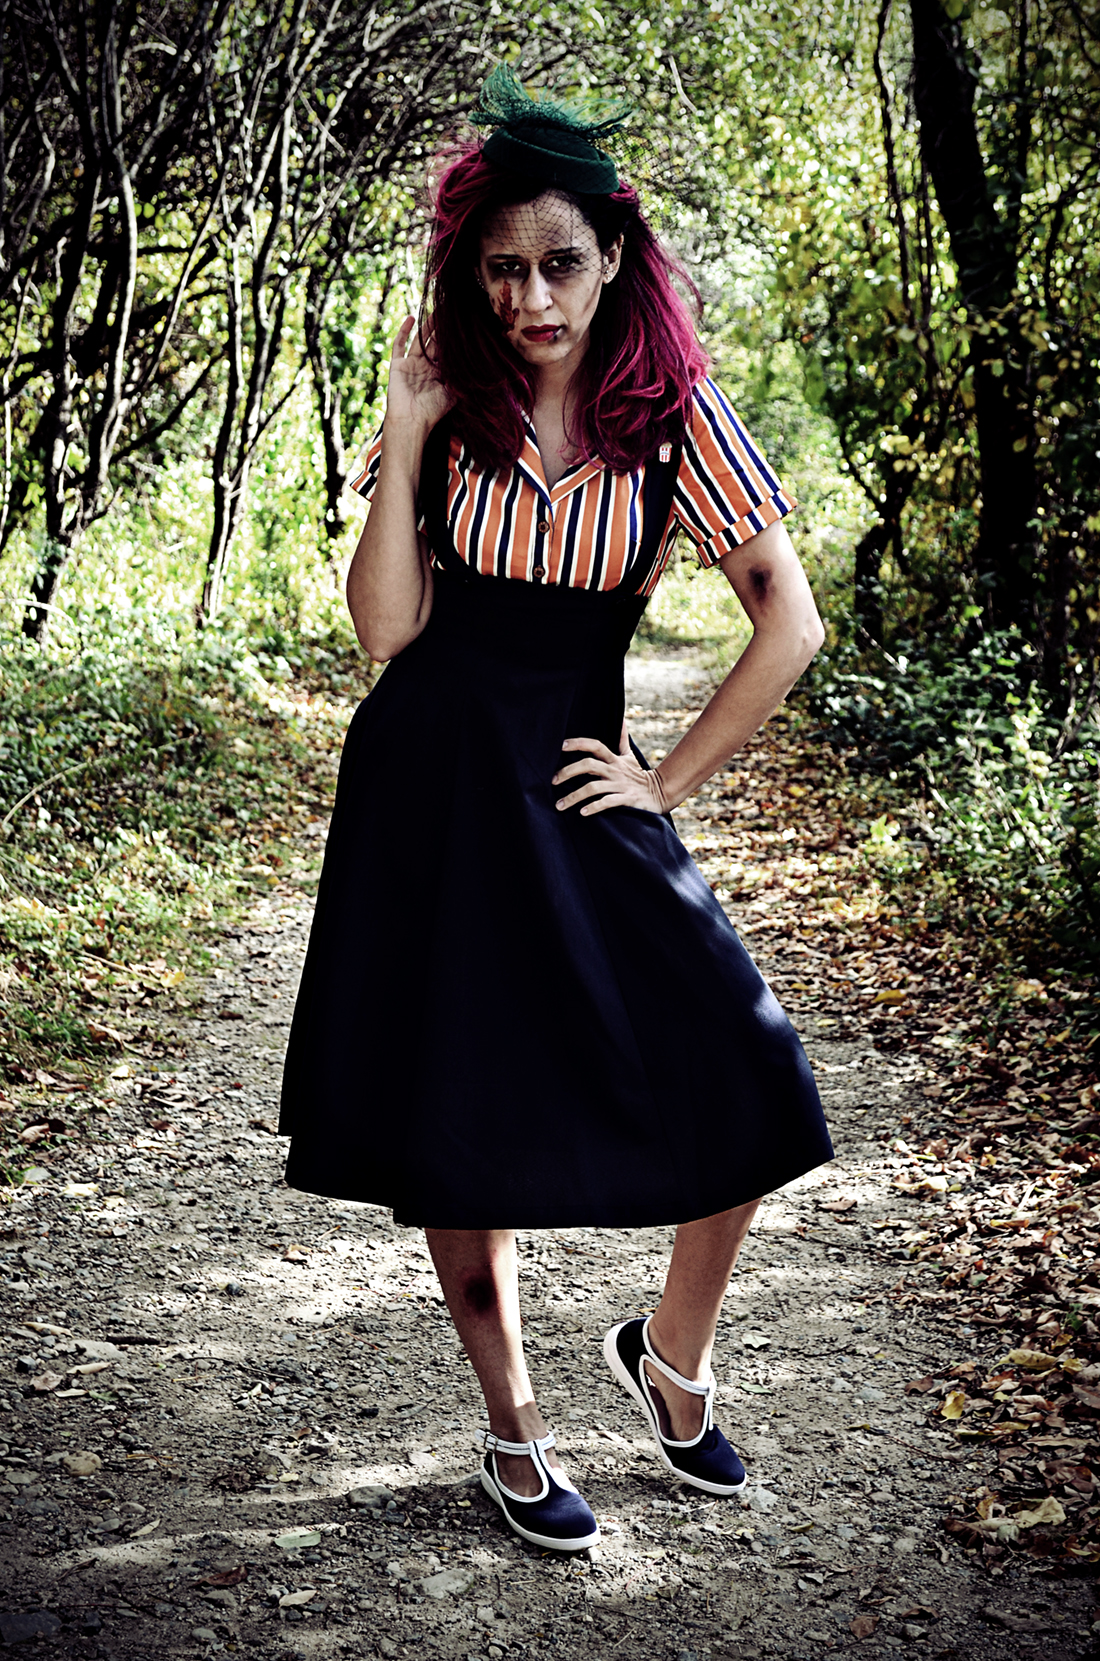
We headed over to a park on our way home to see if it would work. It wasn’t ideal, but I think it did the job! I think the more neutral background helps the costume and makeup stand out more anyway 🙂
(note – I usually hate my twisted tooth, but look at how perfect it is in the photo above! It kinda adds to the zombie vibes)
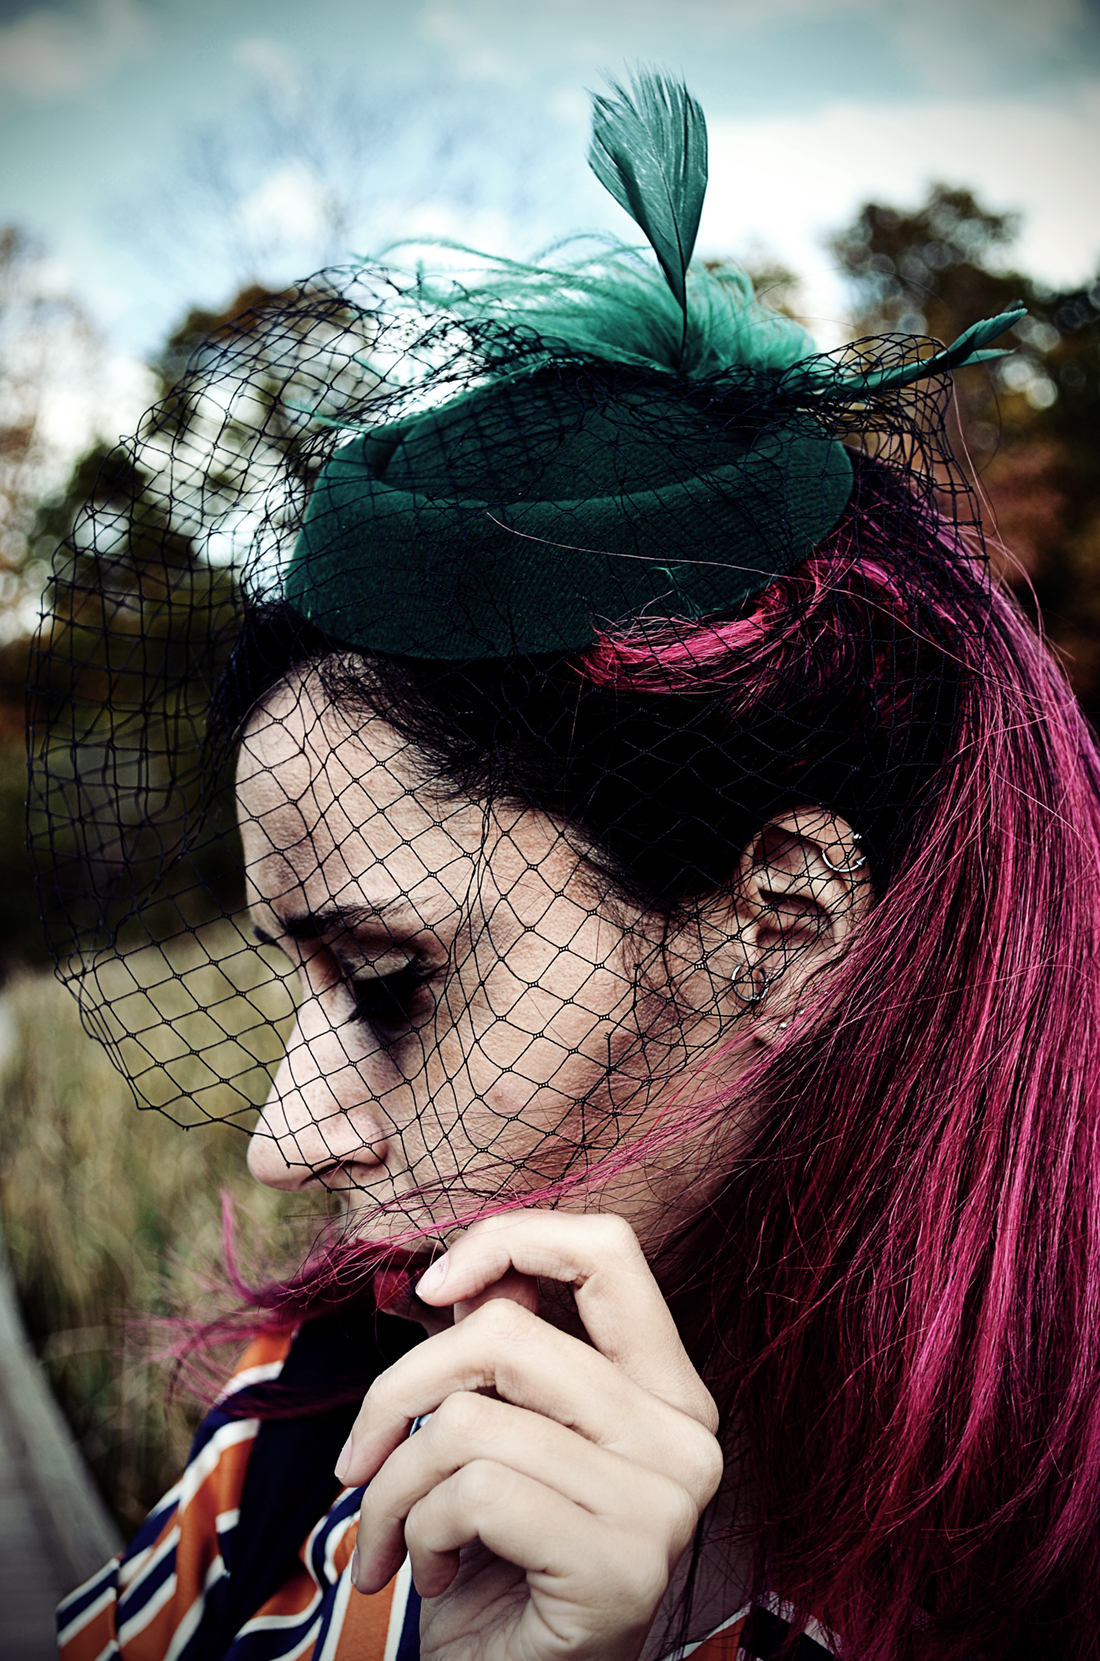
I had so much fun posing for these pics, especially for the portraits! The close-up shots really highlight the gaping wound on my cheek (which was this 3D transfer I bought online).
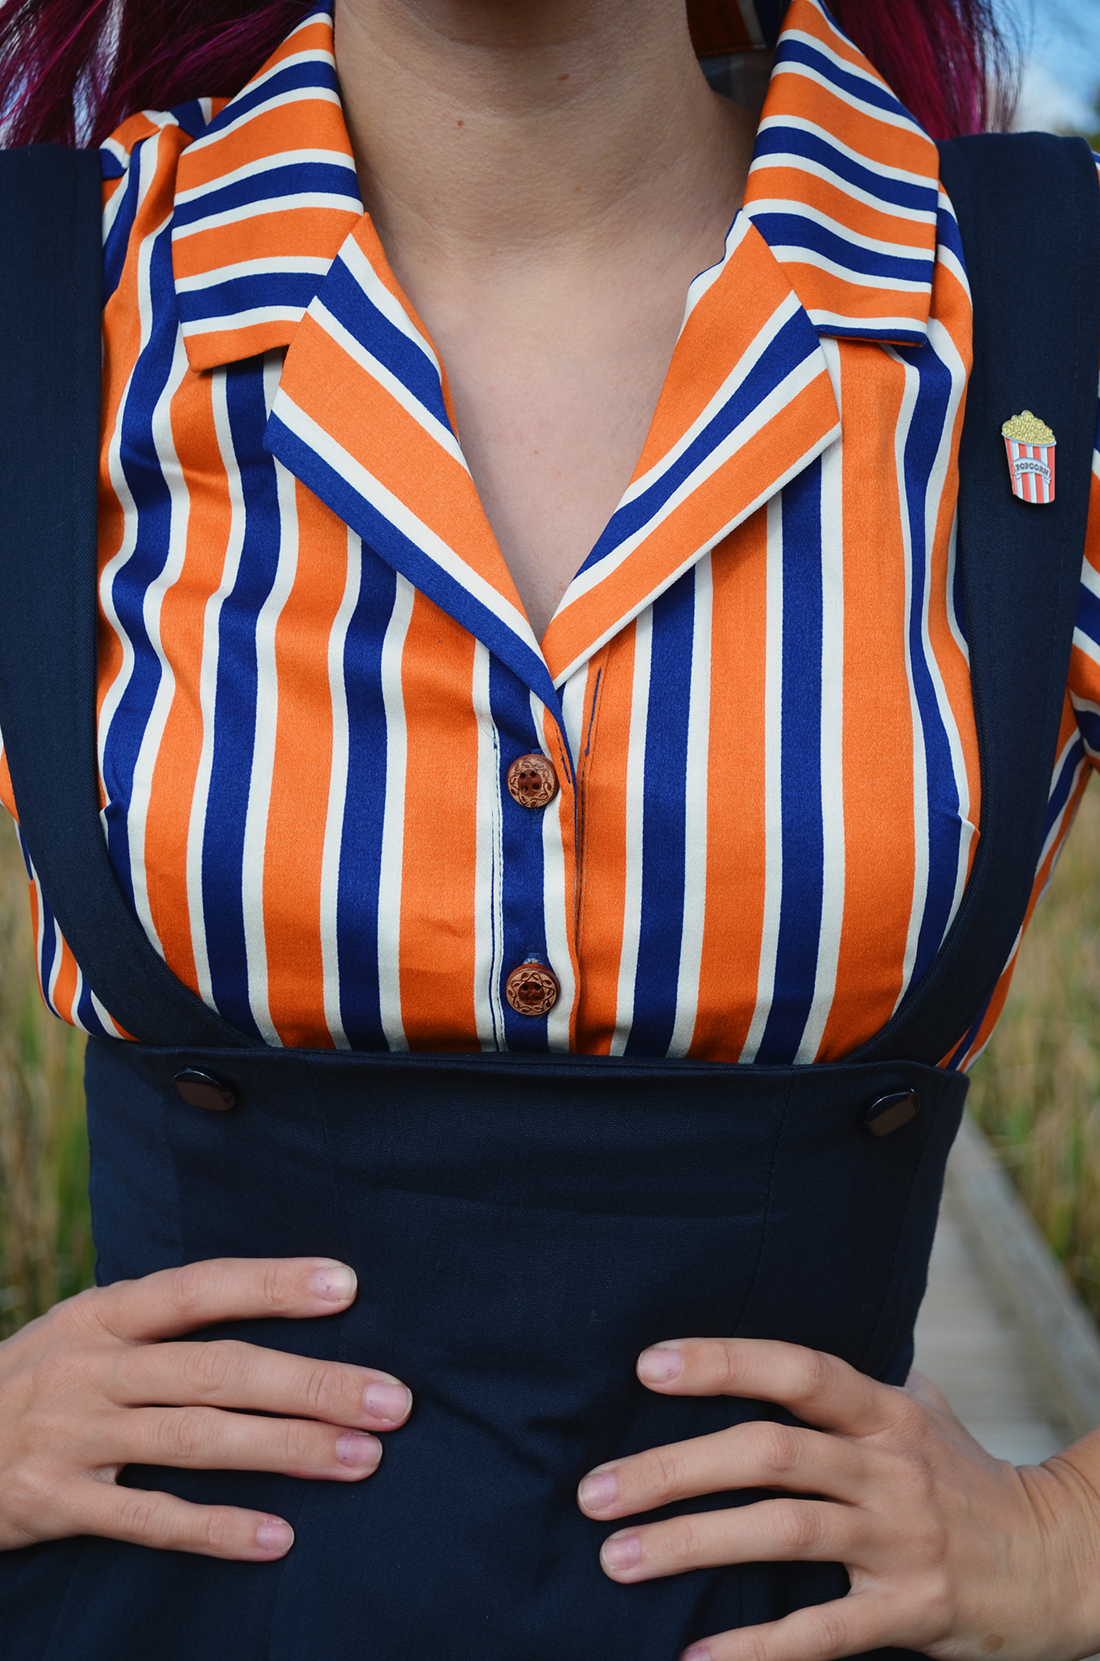
I wore a little popcorn enamel pin to sell the carnival theme, although I definitely think I should have dirtied it up with paint or something! It looks a little too pristine, lol.
Before you go, I just wanted to leave you with two unfiltered shots so you can see how cute the outfit really is.
It’s time for another pattern review! This one isn’t very in-depth, but I’ll try to give you as much info as possible.
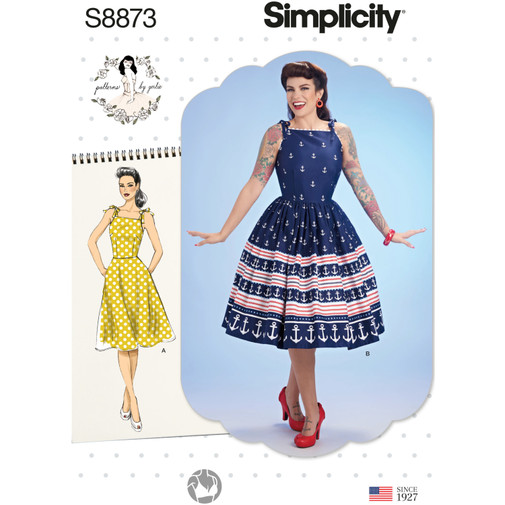
The vintage/retro gal’s dream dress has got to be Gertie’s S8873. Check it out:
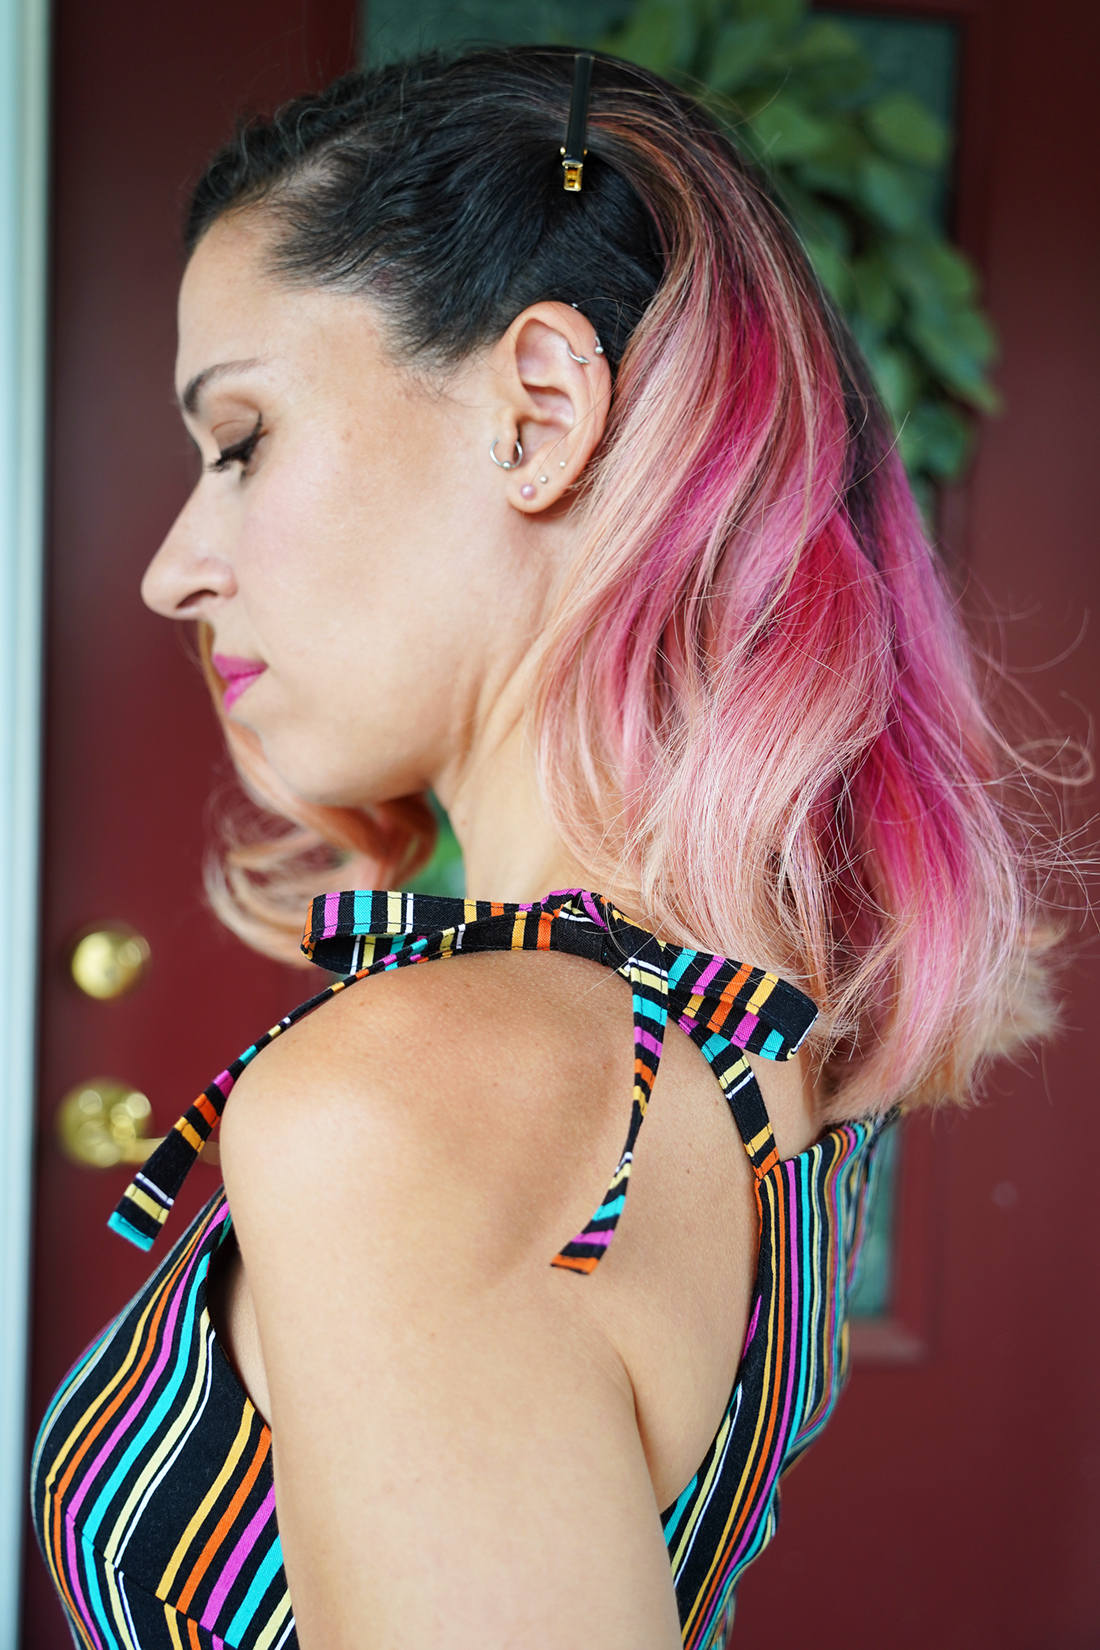
The tie straps, the full skirt, the simple lines – this is one that can be made over and over again in many different fabrics and you won’t get tired of it! (Which, FYI, I plan on doing. Stay tuned…)
I checked the dress measurements (the actual measurements, not the bogus ones with too much ease on the back of the envelope), and I was falling a bit in between sizes. My waist was an 8, while my bust was somewhere between 6 and 8. The hips didn’t matter since I was going for the full-skirted option.
I ended up grading between the 8 and a 7ish (I just eyeballed where that would be) and then kept everything else as-is.
It ended up working fairly well with a few minor issues:
The waist was about 3/4″ too long. Augh, I hate when that happens! I’m a bit short-waisted and I always forget to check that before I sew.
I also felt as though the top was a little too tall up by my collarbone. There’s nothing wrong with it fit-wise, but it’s just a preference thing.
The real star of this dress pattern? The waist darts!! OMG, I didn’t know I could fall in love with a waist dart. They are curved instead of straight lines, so they perfectly hug the curves of the bust. I don’t need much support in that area, but these darts provide it so that I don’t have to wear a bra. (Not sure how well that would work for the larger-busted gals, though).
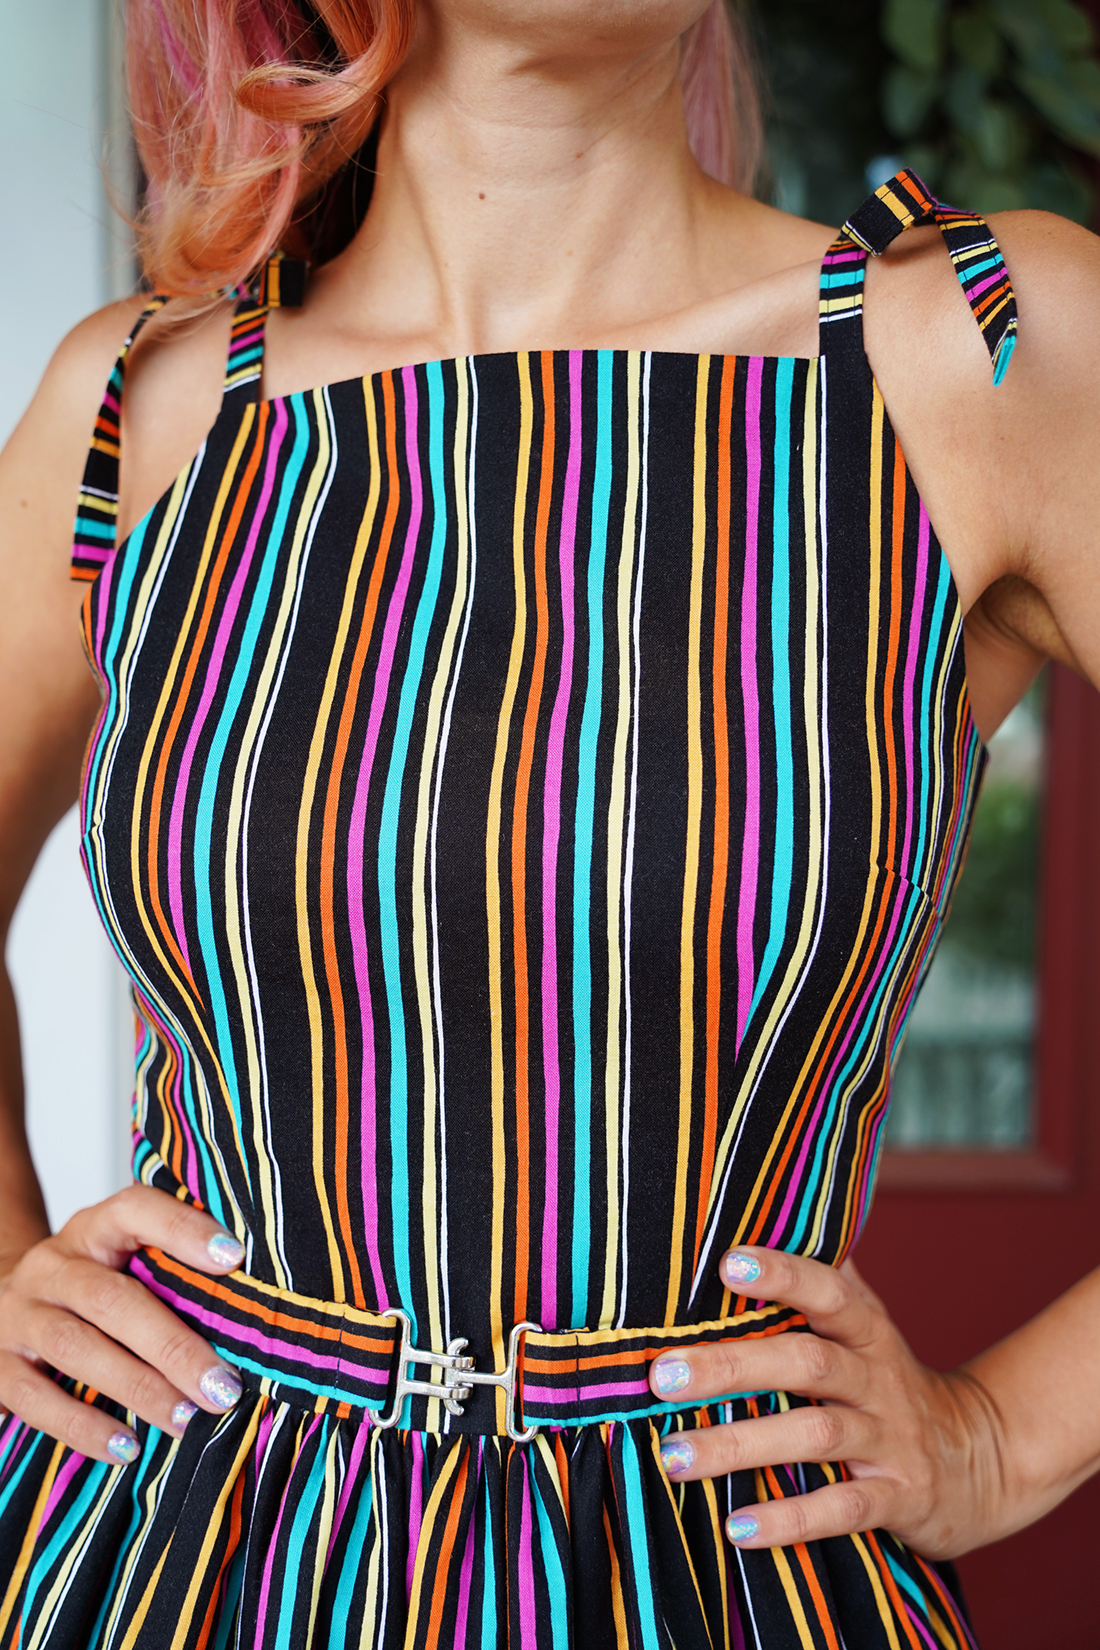
I had some extra fabric left over, so I went ahead and made a matching belt! I LOVE elastic belts since they move with you (instead of pinching you weirdly when you sit down or bend over), so this was definitely what I wanted.
I already had some 1″ wide elastic and this belt fastener in my stash, so I simply covered it with the fabric. I first sewed a tube longer than I needed, then fed the elastic through. It took some manipulating to get it to stretch enough with the elastic but not bunch too much. I think I found the perfect balance! It’s a really cute finishing touch.
This dress went through quite the transformation from its inception to its final form!
(Also, I know this is my blog and I don’t have to apologize for having many photos, but I want you to know what you are getting into. There are MANY photos ahead!)
Every summer in early July, my husband and I go to Ocean City, NJ with his family. We rent the same beach house (a block and a half from the water!) and try to disconnect for a week or two. It’s pretty amazing.
I usually try to make a summer dress in the week between the end of the school year and the start of the vacation. Here’s what I made last year. Well anyway, this year I wanted to make something really easy without a pattern.
I have seen a lot of tutorials for a shirred bodice created with elastic thread paired with a simple skirt and tie straps. This seemed like the PERFECT project – what could go wrong? (note: if you realized that these photos in fact do NOT feature a shirred dress, then you already know something went wrong. If you are here for the M7778 review, be patient. I promise I will get to it!)
For fabric I opted for a comfy bedsheet from Target. I bought this because it was under 10 bucks for the whole set – fitted sheet, flat sheet, and pillowcases. I have only made a dress from a bedsheet once a million years ago, but this fabric was so darn cute it didn’t give me bedsheet vibes at all! It is light, airy, drapey, summery…it has it all!
I hand-wound my bobbins with elastic thread, adjusted my tension, and got to with the shirring. I shirred, and shirred, and shirred – my gosh, this took a long time. I only did the back panel when I decided to steam it (to shrink the elastic) and see how much stretch I had.
Unfortunately, I didn’t have much stretch at all. I thought it was supposed to shrink to half its size, but I was lucky if I was getting 3/4 the original size. I don’t have a lot of experience shirring, so I know I messed it up somehow.
It was also taking so long (a couple of hours at this point, due to the narrow distance I put between each line) that I lost interest in even making the front shirred panel.
It was time to pivot!
I had this great idea to keep the back shirred and create a more standard fitted bodice for the front. This wasn’t a great idea. If you sew, you know that by doing this there would be even less room for me to get in and out, and would have to add a zipper. I didn’t consider that at this point.
For the bodice front, I opted for McCall’s M7778.
It had the casual vibe I wanted, plus the tie straps.
I made a mock-up of the bodice front and attached it to the shirred panel I created (which at this point also had a long tail that I had intended to be the skirt).
I realized that the bodice pattern was too short, and more importantly, that if I stretched the back enough so that it wasn’t gaping, it was too small for me to fit over my head.
It was time to pivot (again)!
I came to the conclusion that the best plan was to just make the dress in the pattern. I opted for view A with a longer skirt, cut in a size 10. I also lengthened the front and back bodice by 5/8 inch.
It was fairly easy to sew, and I LOVE that the front bodice has a seam down the center. This made it a breeze to create a sharp point at the center of the sweetheart neckline. Since the pattern is quite busy the seam is not very noticeable, but if I was using a different fabric I would definitely want the pattern to match up.
The bodice is also fully lined, which ended up being great for this fabric since it is so thin. I used the same fabric to create the lining and interfaced it for more structure.
If I make this pattern again (which I probably will for the adorable view D!!) I will definitely lengthen the bodice a bit more. Maybe by another 1/2 inch? I really prefer when the waistline hits my natural waist and this was just ever so slightly off.
I will also make a size 8 instead of 10. Why is there SO MUCH EASE in Big 4 patterns? I think the envelope measurements put me at a 12 so I was already sizing down. I had to take out so much fabric when I installed the zipper to make it fit me.
(FYI: My measurements are 34-26-36)
I also started to add cute little woven labels to my handmade clothing! I bought a couple of different styles of Kylie and the Machine labels from Etsy, and I can’t wait to buy more! It makes me smile when I put them on 🙂
These photos were all taken at Barnegat Lighthouse. Dave always talked about how his family would visit it when he was a kid, so I was excited to finally check it out!
When we got there, unfortunately, the whole thing was covered in scaffolding. It wasn’t quite the picturesque scene I was imagining! But I’m sure you can see from the photos that it was still a beautiful location with the moss-covered rocks. I guess we will just have to visit it again sometime!
About 45 minutes south of Ocean City is a town called Wildwood. I had always wanted to go because they have a street with a lot of retro motels and signs. Plus, their Wawa has a cool (and cartoonish) mid-century design!
Seeing as I’m about 1,000 posts behind here on the ol’ blog, I figured it was time to get back in the game. I know that not many people even read this, but I like having a place to put all of the stories behind my looks that end up on my IG account.
Dave and I have never really done much for Valentine’s Day.
We are very lovey-dovey year-round, so there really is no need to have a special day to show our love for each other! But that doesn’t mean that I don’t love wearing red and hearts on v-day 🙂
Back in September, my friend Sara gave me the cuuuuutest skirt and top (top not shown) for my birthday! Just look at those colors! I can’t help but smile every time I put it on!
Over the summer I sewed a new to me pattern, the Frida Skirt (from Schultz Apparel). It was so quick and easy to put together, and I love that since it is a wrap skirt it will fit if I gain or lose a bit of weight. I also sewed one for my girl Sara (see her FANTASTIC styling of it here).
I had such a fun time posing for these photos! Dave and I LOVE Halloween, and have been working on decorations for our front porch. He had this awesome idea to separate a skeleton and have him shackled up in two halves, as if he got pulled apart medieval rack-style.
When I turned 34, the only thing I wanted was a tea party with my besties! You can read more about our elegant afternoon at the Boston Public Library’s tea room here.
Now that I’m 38 (insert shocked face here!), I thought a great way to celebrate would be to have a few people over for an at-home tea party. Unfortunately, Covid prevented me from inviting all of my gal pals over, but I was thrilled to enjoy the company of my friends Meghan and Sara, along with my hubby, Dave!